CELTIC KNOT FINANCIER WITH PEAR
Ingredients
- 8 Portions
-
Celery Financier
- 240g Celery Sticks
- 225g Granulated Sugar
- 3 Orange Zest
- 1 Vanilla pod
- 360g Avonmore Professional Unsalted Butter
- 150g Ground Almonds
- 150g T55 Flour
- 150g Egg whites
-
Pear Pâte de Fruit
- 500g Pear puree
- 42g Sugar 1
- 9g Yellow pectin
- 418g Sugar 2
- 51g Glucose syrup
- 14g Citric acid
-
Brown Butter Mousse
- 144g Avonmore Professional Cream 35.1%
- 180g Avonmore Professional Unsalted Butter - browned
- 63g Butter Solids
- 471g Condensed Milk
- 270g Eggs
- 471g Avonmore Professional Cream 35.1%
- 21g Sugar
- 2.7g Salt
- 6 leaves Gelatine
-
Green Glaze
- 150g Water
- 300g Glucose DE40
- 300g Sugar
- 200g Condensed Milk
- 300g White Chocolate Valrhona Ivoire
- 350g Gelatine Mass
- Green Hydrosoluble Food colouring
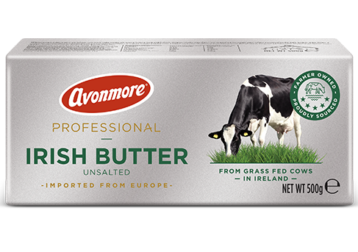
Featured Product

Unsalted Lactic Butter83% Fat 500g
The recipe, Step by Step
Elements
- Celery Financier
- Pear Pâte de Fruit
- Brown Butter Mousse
- Green Glaze
Décor:
-
Celery Financier
1. Wash and peel the celery and cut into little pieces.
2. Caramelise 75g of the Granulated sugar, add the celery, orange zest and vanilla.
3. Cover with a lid and leave it until it cooks down into a compote.
4. Blend the celery and leave to cool.
5. Cook the Avonmore Professional Unsalted butter until it turns to brown butter and leave it to cool.
6. In a bowl add the remaining Granulated sugar, ground almonds, flour and celery puree. Mix ingredients together, slowly incorporate the cooled brown butter and the egg whites.
7. Pipe the mix into 10cm diameter silicone mould
8. Cook at 180°C for 7 minutes in the oven.
9. Freeze.
-
Pear Pâte de Fruit
1. Heat the purée to 45°C, add the yellow pectin mixed with sugar and bring to the boil.
2. Gradually pour the second weighed quantity of sugar whilst still boiling.
3. Then add the glucose syrup and cook at 106/107°C.
4. Once off the heat, add the citric acid solution, stir and pour immediately into a silicone mould.
5. Pour 250g onto the Financier.
6. Leave to crystallise in the freezer before removing from the mould.
-
Brown Butter Mousse
1. In a saucepan, combine the first Avonmore Professional Cream 35.1%, browned butter, brown butter solids, and condensed milk. Whisk until smooth.
2. In a bowl whisk together the sugar and eggs. Whisk until the egg is light and fully incorporated.
3. Place the saucepan over medium heat and cook the mixture, stirring constantly, until it reaches a temperature of 90°C.
4. Place the gelatine into water to bloom.
5. Pour the cream mixture over the eggs. Whisk and place back into the pan. Cook to 75°C. Use a pastry thermometer to ensure accurate temperature measurement.
6. Remove the saucepan from the heat. Add the gelatine. If using an immersion blender, blend the mixture until smooth. Otherwise, transfer the mixture to a blender and blend until smooth. Allow the pastry cream to cool completely in the refrigerator, stirring occasionally to prevent a skin from forming.
7. Once the pastry cream is 35°C, in a separate bowl, whip the cream until soft peaks form.
8. Temper the pastry cream by taking a small amount of the whipped cream and whisking it into the pastry cream. This will gradually warm the pastry cream and prevent the whipped cream from
deflating when folded in. Gently fold
the remaining whipped cream into the
pastry cream until just incorporated.
9. The pastry cream is now ready to use.
10. Pipe into the mould.
-
Green Glaze
1. In a saucepan, combine the water, glucose, and sugar. Heat over medium heat, stirring occasionally, until the sugar dissolves completely. Use a candy thermometer to reach 103°C.
2. Pour the hot sugar mixture over the chocolate, condensed milk and let it sit for a minute.
3. Using an immersion blender, blend the mixture for a good minute until smooth and glossy. Ensure you reach all corners of the bowl to incorporate any unmelted chocolate.
4. Add the bloomed gelatin to the hot glaze mixture. Blend for another 30 seconds to ensure it’s fully incorporated.
5. Strain the glaze through a fine-mesh sieve to remove any air bubbles or undissolved gelatin. Add your desired red food colouring and blend again for a few seconds until evenly distributed.
6. Using the Glaze:
7. Let the glaze cool to a working temperature between 30-35°C. It should be pourable but still thick enough to coat the cake. You can test the consistency by dipping a spoon in the glaze and letting it drip back into the container. It should coat the spoon but leave a clean trail when your finger runs across it.
8. Place your frozen cake (ensuring a smooth surface) on a wire rack set over a baking sheet to catch drips.
9. Pour the glaze over the frozen cake, starting from the centre and allowing it to cascade down the sides.
10. Once coated, use a scraper or offset spatula to gently smooth any imperfections on the sides.
11. Transfer the cake to a serving plate and allow it to thaw completely in the refrigerator before serving.
12. Make sure your cake is completely frozen before glazing. This helps the glaze set properly and achieve a mirror-like finish.
13. Work quickly with the glaze once it reaches the working temperature, as it starts to thicken as it cools.
14. If the glaze becomes too thick, you can reheat it gently over low heat, whisking constantly, until it reaches the desired consistency again. Don’t overheat, as this can affect the texture and shine of the glaze.
